Good interior photography isn’t just for the pros with $10,000 in camera gear. Whether someone’s documenting a renovation for insurance, selling a home, or building a portfolio of their DIY work, knowing how to photograph a room properly makes all the difference. Bad lighting flattens a beautiful space. Poor angles make a 12×14 bedroom look like a closet. And phone snapshots with harsh shadows won’t do justice to that custom tile backsplash or the built-ins someone spent three weekends building. This guide covers the equipment, techniques, and editing basics that turn amateur snapshots into photos worth framing, or posting.
Table of Contents
ToggleKey Takeaways
- An interior design photographer specializes in capturing residential and commercial spaces with an emphasis on composition, lighting quality, and architectural details rather than just speed and coverage.
- Professional-quality interior design photography improves home sales, supports renovation documentation for insurance claims, and showcases DIY craftsmanship without requiring expensive $10,000+ camera gear.
- Essential equipment includes a camera with manual controls and RAW format capability, a wide-angle lens (16-35mm equivalent), a tripod, and proper lighting tools—smartphones with these features can work for most documentation needs.
- Mastering natural light, avoiding window blowout through HDR bracketing, and balancing ambient and daylight with matching color temperatures (5000K-5500K) are critical lighting techniques that transform interior spaces.
- Shooting from room corners, keeping verticals straight, styling lightly, and using leading lines creates depth and highlights architectural details that amateur snapshots typically miss.
- Post-processing in RAW format with perspective correction, white balance adjustment, and moderate sharpening polishes interior photos without the over-saturated look of poorly executed editing.
What Is an Interior Design Photographer?
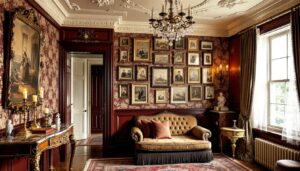
An interior design photographer specializes in capturing residential and commercial spaces in ways that highlight design elements, spatial flow, and architectural details. Unlike real estate photography, which often prioritizes speed and wide coverage, interior design photography focuses on composition, lighting quality, and styling.
Professional interior photographers work with designers, architects, builders, and publications like Architectural Digest to create portfolio-worthy images. They understand how to manage mixed lighting (daylight plus interior fixtures), correct for perspective distortion, and stage a room so it photographs cleanly without looking sterile.
For DIYers and homeowners, the same principles apply on a smaller scale. Someone documenting a kitchen remodel or creating content for a home improvement blog benefits from learning these techniques. It’s not about owning pro gear, it’s about understanding how cameras see space differently than human eyes do.
Why Professional Photography Matters for Your Home Projects
Quality photos serve multiple practical purposes beyond aesthetics. Homeowners selling a property see measurably better results with professional-quality images. Listings with well-lit, composed interior shots get more inquiries and often sell faster than those with dim phone photos.
For anyone tracking a renovation, before-and-after documentation is invaluable. Insurance claims, warranty disputes, and resale value all hinge on having clear visual records. A detailed photo of that load-bearing wall before it was modified, or the subfloor condition before new hardwood went down, can save thousands if issues arise later.
DIYers building a portfolio, whether for side income or personal pride, need photos that show craftsmanship. A hand-built bookcase or custom wainscoting deserves better than a grainy snapshot with a laundry basket in the corner. Good photography also forces better project planning: if a space isn’t clean and styled enough to photograph well, it probably isn’t finished.
Finally, many interior design strategies become more apparent through the camera lens. Viewing a room as a flat, two-dimensional image reveals balance issues, color clashes, and awkward focal points that aren’t as obvious in person.
Essential Equipment for Photographing Interior Spaces
Camera: A DSLR or mirrorless camera with manual controls provides the most flexibility, but a modern smartphone with RAW shooting capability works for most DIY documentation. The key is shooting in RAW format, which captures more detail and allows better editing latitude than JPEGs.
Lens (for interchangeable-lens cameras): A wide-angle lens (16-35mm full-frame equivalent, or 10-24mm on APS-C) is essential for interior work. Rooms photograph smaller than they feel. A 50mm “normal” lens often can’t capture enough of a space without backing into a wall. Avoid ultra-wide fisheye lenses, they distort verticals and make rooms look cartoonish.
Tripod: Non-negotiable for interiors. Tripods enable longer exposures in low light, ensure sharp images, and allow HDR bracketing (shooting multiple exposures to blend later). A sturdy tripod also keeps the camera level, which prevents converging verticals, when walls appear to lean inward.
External Flash or Speedlight (optional): Useful for bounce lighting, aiming the flash at a ceiling or wall to create soft, diffused light. Direct on-camera flash creates harsh shadows and blown-out highlights. Many photographers skip flash entirely, relying on natural and ambient light with longer exposures.
Remote Shutter Release or Timer: Eliminates camera shake from pressing the shutter button. Most cameras have a 2-second timer function that works fine.
Level or Grid Overlay: Many cameras have an electronic level or grid display. Use it. Crooked horizons and tilted verticals look unprofessional and are tedious to fix in post.
Safety Note: When working on ladders for elevated shots, ensure stable footing and have someone nearby if reaching awkward angles. Dropping a camera is expensive: falling off a ladder is worse.
Lighting Techniques That Transform Interior Photos
Lighting makes or breaks interior photography. The goal is even, natural-looking illumination that doesn’t flatten the space or create harsh shadows.
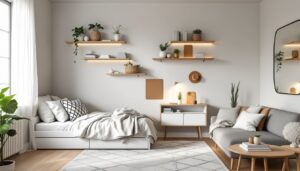
Maximize Natural Light: Shoot during the day when indirect sunlight fills the room. North-facing windows provide soft, consistent light. Direct sunlight creates high-contrast hot spots, either schedule around it or diffuse it with sheer curtains. Turn off overhead lights initially: many interior fixtures cast yellow or green color casts that clash with daylight.
Balance Ambient and Natural Light: If a room feels too dim, turn on lamps and fixtures, but try to match color temperatures. LED bulbs rated 5000K-5500K (daylight) blend better with window light than warm 2700K bulbs. Mixing color temperatures creates a muddy, hard-to-correct look. Some photographers use color-correcting gels on fixtures, but that’s overkill for most DIY purposes.
Avoid Window Blowout: Cameras can’t handle the dynamic range human eyes manage. If windows appear as blown-out white rectangles, either shoot during overcast conditions, use HDR bracketing (taking multiple exposures at different brightness levels and blending them), or expose for the windows and lift shadows in editing.
Use Long Exposures: With the camera on a tripod, a 1/4 to 2-second exposure captures more ambient light, reducing reliance on flash. Close blinds or draw curtains slightly if windows still blow out. Some professionals shoot one exposure for the interior and another for the window view, then composite them.
Bounce Flash When Necessary: If a room lacks sufficient light, aim a speedlight at the ceiling (if it’s white or light-colored) at a 45-degree angle. This creates soft, even overhead light. Never fire flash straight ahead, it’s the lighting equivalent of a sledgehammer.
Composition and Styling Tips for Interior Photography
Shoot from Corners: Positioning the camera in a room’s corner captures two walls, showing depth and context. Shooting from the middle of a wall flattens perspective. A corner shot includes more architectural detail, door casings, baseboards, ceiling lines.
Keep Verticals Straight: Tilting the camera up or down makes walls lean. Keep the camera back parallel to the wall. If shooting a tall space, raise the tripod or use a step stool rather than angling the camera. Many editing programs have perspective correction tools, but it’s better to get it right in-camera.
Mind the Clutter: Clear countertops, hide cords, remove personal items and anything that dates the photo (like outdated electronics). Style surfaces lightly, a cutting board and a bowl of lemons on a kitchen island, not a pile of mail and car keys. Less is more.
Use Leading Lines: Architectural features like floor planks, ceiling beams, or tile grout lines guide the viewer’s eye. Align these elements with the frame edges or use them to draw attention to focal points like a fireplace or feature wall.
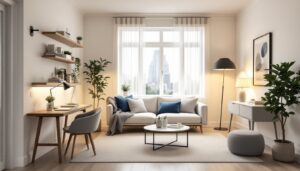
Include Layers: Foreground, midground, and background elements add depth. An open doorway in the foreground, a furnished room in the middle, and a window in the back create a sense of space. Platforms like Houzz showcase interiors using these layering techniques for inspiration.
Highlight DIY Work: If photographing a project, built-in shelving, custom trim, or a new backsplash, compose the shot to feature that element. Crop tightly to show detail, or pull back to show it in context. Many interior design tools help visualize these compositions before shooting.
Watch Reflections: Mirrors, glass-front cabinets, and glossy tile can reflect the photographer or tripod. Adjust angles or remove reflective elements temporarily. TV screens should be turned off unless showing content intentionally.
Editing and Post-Processing Your Interior Design Photos
Editing transforms a good photo into a polished one, but restraint matters. Over-processed images look fake.
Software: Adobe Lightroom is the industry standard, offering robust tools for exposure, color correction, and perspective adjustments. Free alternatives include Darktable (desktop) and Snapseed (mobile). Shoot in RAW format for maximum editing flexibility.
Correct Perspective Distortion: Use the transform or geometry tools to straighten verticals. Drag sliders until walls are plumb. This step is critical, tilted verticals scream amateur.
Adjust Exposure and Contrast: Lift shadows slightly to reveal detail in darker corners, but don’t eliminate them entirely, some shadow gives dimension. Pull back highlights to recover blown-out windows. Increase contrast modestly to add punch.
White Balance: If mixed lighting created color casts, adjust the temperature and tint sliders until whites look neutral. Sample a known white or gray surface (like a wall or ceiling) with the white balance tool.
HDR Blending (if shot multiple exposures): Merge the bracketed exposures using Lightroom’s HDR Merge or similar software. This retains detail in both bright windows and dark corners. Avoid the over-saturated, haloed look of poorly done HDR.
Sharpening and Noise Reduction: Apply moderate sharpening to enhance details like trim and texture. If long exposures introduced noise (graininess), use noise reduction tools, but too much softens the image.
Crop for Final Composition: Tighten the frame to eliminate distractions at the edges. Maintain a level horizon. Many interior design techniques emphasize symmetry and balance, which becomes more evident after cropping.
Export Settings: Save finals as high-resolution JPEGs (quality 90-95%) for print or portfolio use. For web use, resize to 2000-3000 pixels on the long edge to balance quality and load time. Publications like Dwell provide submission guidelines if targeting editorial features.
Conclusion
Interior photography isn’t about expensive gear, it’s about understanding light, composition, and the way cameras interpret three-dimensional space. A homeowner with a smartphone and a tripod can produce photos that do justice to their work, whether that’s a freshly painted room or a full kitchen gut. Clean the space, manage the light, keep the camera level, and edit with restraint. The rest is practice.