
An interior design lookbook isn’t just a stack of pretty pictures torn from magazines. It’s a working tool that bridges the gap between daydreaming about a beautiful space and actually building one. Whether someone is planning a full renovation or just wants to freshen up a single room, a well-organized lookbook helps clarify design direction, narrow down material choices, and communicate ideas to contractors or family members.
The challenge isn’t finding inspiration, it’s managing the flood of images, colors, and styles into something coherent and actionable. A solid lookbook cuts through the noise and turns scattered ideas into a real blueprint for home improvement projects.
Table of Contents
ToggleKey Takeaways
- An interior design lookbook is a structured, actionable reference tool that transforms scattered inspiration into a cohesive blueprint for home improvement projects.
- Organize your interior design lookbook by room and style category, using digital tools or physical binders with subsections for flooring, wall treatments, lighting, and hardware to maintain consistency.
- Include annotated images, physical material samples, product specs, dimensions, and a budget tracker in your lookbook to prevent costly mistakes and scope creep.
- Break projects into three phases—structural work, surface prep and finishing, and fixtures—and reference your lookbook throughout each phase to keep design decisions on track.
- Share your completed interior design lookbook with contractors during the bidding process to communicate specific details like grout joint widths and installation patterns, reducing misunderstandings.
- Update your lookbook with real project photos, installation notes, and purchase details to create a valuable record for future projects and warranty service.
What Is an Interior Design Lookbook and Why You Need One
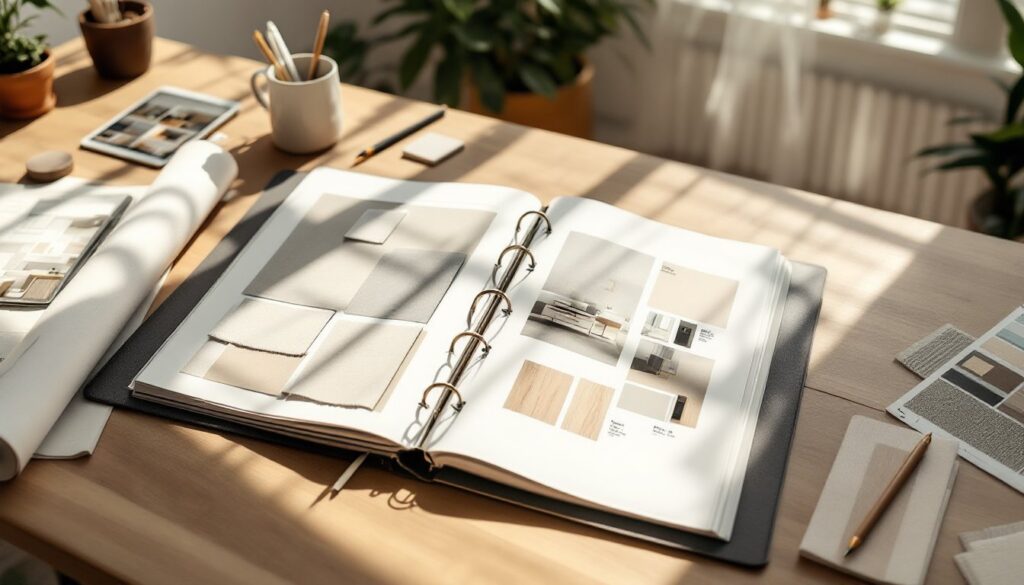
An interior design lookbook is a curated collection of images, materials, color swatches, and notes that define the visual direction for a space. Think of it as a reference binder or digital folder that captures everything from furniture styles and paint colors to hardware finishes and tile patterns.
Unlike a mood board, which might be loose and aspirational, a lookbook is more structured. It organizes ideas by room, function, or style category. It’s meant to be revisited throughout a project, during demolition, material ordering, and installation, so decisions stay consistent.
For DIYers tackling their own projects, a lookbook prevents decision fatigue. When standing in a big-box store aisle staring at 200 paint chips, a lookbook with tagged color references keeps choices on track. It also helps avoid costly mistakes, like ordering the wrong shade of grout or buying furniture that clashes with an existing palette.
For anyone working with contractors, designers, or even just a handy friend, a lookbook serves as a communication tool. Instead of trying to describe “that warm gray with a hint of beige,” someone can point to a tagged swatch or saved image. It keeps everyone on the same page and reduces back-and-forth.
How to Create Your Own Interior Design Lookbook
Building a lookbook from scratch doesn’t require design software or a subscription service. It just needs intention and a system that works for the individual.
Gathering Inspiration from Multiple Sources
Start by collecting images and ideas from a variety of places. Social media platforms like Pinterest and Instagram are obvious starting points, but they shouldn’t be the only ones. Print magazines, home tours on sites like Homedit, showroom visits, and even neighborhood walks can spark ideas.
When saving images, focus on specifics. Instead of saving a whole room because it “feels right,” zoom in on what actually appeals: the way natural light hits a white oak floor, the proportion of upper and lower cabinets, or the texture of a linen sofa. Tag or annotate each image with notes, “like the wall color, not the furniture” or “crown molding profile for living room.”
Don’t ignore physical samples. Paint chips, fabric swatches, and flooring samples belong in the lookbook too. Many flooring retailers and paint stores offer small sample boards or peel-and-stick squares. These help compare textures and finishes in real lighting conditions, not just on a screen.
Also consider the practical side. Save product specs, dimensions, and installation notes. If a particular tile requires thin-set mortar or a certain underlayment, note that alongside the image. This turns the lookbook into a project planning tool, not just eye candy.
Organizing Your Ideas by Room and Style
Once the collection grows, organization becomes critical. A pile of random images won’t help during crunch time. Break the lookbook into sections that match how the home will actually be worked on.
Most people organize by room: kitchen, primary bedroom, bath, living areas, etc. Within each room section, create subsections for elements like flooring, wall treatments, lighting, furniture, and hardware. This structure makes it easy to cross-reference choices, if the kitchen backsplash tile has warm undertones, the cabinet hardware and faucet finish should complement that.
Another approach is organizing by style or material type, especially for someone working on multiple rooms with a unified aesthetic. A modern farmhouse style might have a section for reclaimed wood accents, another for matte black fixtures, and a third for neutral textiles. This method works well when trying to maintain consistency across an open floor plan.
Digital tools make organization easier. Apps like Canva, Google Slides, or even a shared folder with labeled subfolders work fine. Physical binders with page protectors and tabbed dividers are just as effective for anyone who prefers hands-on planning. The format matters less than the structure.
Include a budget tracker within the lookbook. Tag each item or material with an estimated cost, and keep a running total per room. This prevents scope creep and helps prioritize where to splurge versus save.
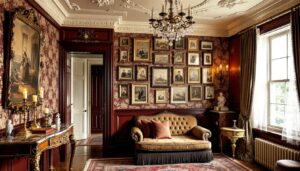
Top Interior Design Styles to Feature in Your Lookbook
Choosing a dominant style gives the lookbook focus. Mixing too many aesthetics leads to a disjointed final result. Here are a few popular styles that translate well into DIY projects.
Modern Minimalist emphasizes clean lines, neutral palettes, and functional furniture. It’s one of the easier styles for DIYers because it often requires less ornamentation and trim work. Think flat-panel cabinetry, simple hardware, large-format tile, and uncluttered surfaces. This style benefits from quality over quantity, a few well-made pieces beat a room full of budget furniture.
Industrial leans into exposed materials: brick, steel, concrete, and reclaimed wood. It works well in lofts or homes with open layouts. DIY-friendly elements include open shelving made from black iron pipe and reclaimed planks, concrete countertops, and pendant lighting with Edison bulbs. Just be cautious with load-bearing walls, exposed beams and structural steel often require permits and engineering.
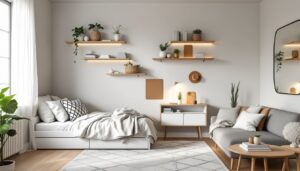
Scandinavian (or Scandi) blends minimalism with warmth. Light wood tones, soft textiles, and plenty of natural light define the look. It’s approachable for beginners because it doesn’t demand perfect symmetry or high-end finishes. Painted white walls, light oak or birch flooring, and simple linen curtains create the foundation. Many effective design techniques center on layering texture and light.
Modern Farmhouse remains popular in 2026, though it’s evolved past the shiplap-everywhere phase. Current iterations focus on natural materials, vintage-inspired fixtures, and a mix of old and new. White or light gray walls, butcher block countertops, apron-front sinks, and mixed metal finishes are common. This style gives DIYers flexibility, salvaged pieces and flea market finds fit right in.
Mid-Century Modern features tapered legs, organic curves, and bold accent colors. Furniture is often the star, so the envelope (walls, floors, ceilings) stays relatively simple. For a DIY project, this might mean refinishing original hardwood floors, adding board-and-batten wainscoting, and hunting down period-appropriate lighting. Working with proven strategies helps balance vintage pieces with updated finishes.
Coastal isn’t just for beachfront properties. It uses soft blues, whites, natural fiber rugs, and weathered wood to create a relaxed vibe. It’s forgiving for DIY work because slight imperfections (like distressed paint or uneven plank walls) add to the aesthetic. Just avoid going overboard with nautical clichés.
Using Your Lookbook to Plan Real Home Projects
A lookbook only delivers value when it’s tied to actual work. Here’s how to turn collected inspiration into completed projects.
Start by identifying which rooms or areas need the most attention. Prioritize based on function, not just aesthetics. A bathroom with a leaking subfloor takes precedence over repainting a guest bedroom. Once priorities are set, pull the relevant lookbook section and start breaking down the project into phases.
Phase 1: Structural and Code Work. If walls are moving, plumbing is being relocated, or electrical is being upgraded, that happens first. The lookbook’s design elements wait until the infrastructure is sound. This is also when permits come into play. Most jurisdictions require permits for structural changes, new electrical circuits, and plumbing modifications. Check local building codes early.
Phase 2: Surface Prep and Finishing. This is where the lookbook truly shines. Flooring, wall treatments, cabinetry, and built-ins get installed. Reference those saved images and material samples constantly. If the lookbook specifies a matte finish on cabinet paint, don’t let a contractor talk you into satin just because it’s easier to clean, finish choice affects the whole aesthetic. For those just starting out, reviewing beginner-friendly approaches can clarify which finishes are DIY-friendly and which might need a pro.
Phase 3: Fixtures and Furniture. Lighting, hardware, plumbing fixtures, and furniture come last. The lookbook should have specific product links or model numbers saved. This prevents last-minute substitutions that throw off the design.
Keep a project log within the lookbook. Note what was purchased, where it came from, and how much was spent. Include installation dates and any issues encountered (like a tile size that required a different grout joint width). This log is invaluable for future projects or if something needs warranty service down the line.
Don’t be afraid to adjust the lookbook as the project progresses. Sometimes a material looks different installed than it did in a sample. Or a planned feature doesn’t work with the room’s actual dimensions. The lookbook is a guide, not a contract. Reviewing real-world design examples can help troubleshoot when plans need tweaking.
If hiring out portions of the work, share the lookbook with contractors during the bid process. A tile setter needs to know if someone wants a herringbone pattern or straight lay, a 1/16″ or 1/8″ grout joint, and whether any cuts need to align with specific sightlines. The more detail provided upfront, the fewer surprises during installation.
For DIYers doing the work themselves, the lookbook becomes a checklist. Cross off tasks as they’re completed, and update photos to show progress. This not only keeps momentum going but also creates a record of the transformation. Many find it helpful to reference practical design tools that support both planning and execution phases.
Conclusion
An interior design lookbook turns vague ideas into concrete plans. It keeps projects on track, prevents costly mistakes, and ensures every choice, from paint color to cabinet hardware, works toward a cohesive vision. Whether tackling a single room or a whole-house renovation, a well-organized lookbook is one of the most practical tools in any DIYer’s kit.