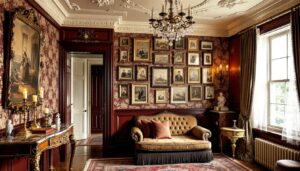

Canva isn’t just for social media graphics anymore. Homeowners and DIY enthusiasts are turning to this free design platform to mock up room layouts, build mood boards, and visualize paint palettes before buying a single gallon. It’s accessible, requires no CAD training, and lets users test ideas digitally instead of on their walls. For anyone planning a refresh, whether it’s rearranging furniture, choosing finishes, or pitching a remodel to a skeptical spouse, Canva offers a surprisingly capable toolkit. This guide walks through how to leverage Canva’s templates, elements, and collaboration features to plan interior projects with confidence and clarity.
Table of Contents
ToggleKey Takeaways
- Canva interior design projects eliminate the need for expensive CAD software by offering an intuitive, browser-based platform with drag-and-drop furniture placement and color visualization.
- Creating mood boards in Canva consolidates paint colors, textures, and inspiration images in one shareable document, reducing miscommunication with contractors and family members.
- Accurate room measurements and scaled floor plans help visualize traffic flow and furniture arrangements before committing to physical changes, preventing costly rearrangements.
- Exporting designs as PDFs or sharing live Canva links enables clear communication with contractors and stakeholders, with labeled measurements and product specifications eliminating guesswork.
- Digital mockups allow homeowners to test multiple furniture and color variations side by side, helping identify spatial problems like undersized rooms or glare issues before execution.
Why Canva Is a Game-Changer for DIY Interior Design
Most homeowners don’t need AutoCAD or SketchUp, they need something that helps them decide whether the couch should go against the east wall or under the window. Canva fills that gap. It’s browser-based, so there’s no software to install, and the free tier includes enough templates and stock images to handle most residential projects.
The drag-and-drop interface means users can arrange furniture icons, swap paint swatches, and layer textures without fumbling through tutorials. Unlike dedicated interior design software that bills monthly and demands hours of onboarding, Canva is intuitive enough for first-timers yet flexible enough for more detailed planning. It also excels at sharing, users can export high-resolution PDFs or share live links with contractors, designers, or family members for feedback.
Another advantage: Canva’s built-in photo editor and background remover let users drop in their own furniture photos, overlay them on room shots, and see how existing pieces fit new layouts. That’s harder to do in traditional CAD tools without importing assets manually. For DIYers who want to visualize before they commit, Canva bridges the gap between Pinterest boards and professional renderings.
Getting Started: Setting Up Your Interior Design Project in Canva
Start by signing up for a free Canva account at canva.com. The free version covers most needs: Canva Pro ($15/month) adds background removal, brand kits, and access to premium stock photos, but it’s not essential for basic room planning.
Once logged in, search for “interior design” or “mood board” in the template library. Canva offers pre-sized layouts for presentations, Pinterest pins, and A4 documents, pick the format that matches how the design will be shared. For mood boards and color palettes, an 8.5″ × 11″ or square format works well. For floor plans, a landscape layout (1920 × 1080 px) gives more working room.
Before diving in, gather reference materials:
- Room measurements (length, width, ceiling height). Use a tape measure, don’t guess.
- Photos of the existing space from multiple angles, including corners and windows.
- Inspiration images saved from Houzz or design blogs.
- Paint chips, fabric swatches, or flooring samples if choosing finishes.
Create a new project and name it clearly (e.g., “Living Room Remodel – April 2026”). Canva auto-saves to the cloud, but it helps to stay organized if tackling multiple rooms.
Creating Mood Boards and Color Palettes
A mood board is the visual anchor for any design project. It gathers colors, textures, furniture styles, and lighting ideas in one place so decisions stay cohesive. In Canva, mood boards come together fast.
- Choose a template or start with a blank canvas. Search “mood board” in the template library for pre-designed grids.
- Upload inspiration photos. Drop in screenshots from Decoist or snapshots of rooms that feel right. Arrange them in a grid or freeform layout.
- Add color swatches. Use Canva’s color picker to sample hues directly from uploaded images, or manually input paint codes (Benjamin Moore, Sherwin-Williams, etc.). Place colored squares or circles on the board to visualize the palette.
- Layer textures. Upload photos of wood grain, tile, fabric, or wallpaper samples. Scale them down and cluster them near corresponding furniture or trim elements.
- Include text labels. Note paint names, product types, or material specs. This keeps everyone on the same page during execution.
Mood boards are especially helpful when presenting ideas to contractors or family members who struggle to picture abstract concepts. A single sheet showing wall color, flooring, upholstery, and lighting fixtures eliminates guesswork and reduces the chance of costly misunderstandings. Exploring interior design strategies helps users understand how to balance aesthetics with functionality.
Designing Floor Plans and Room Layouts
Canva isn’t a substitute for architectural drafting software, but it handles basic floor plans and furniture layouts well enough for most DIY projects. It’s particularly useful for visualizing traffic flow, furniture scale, and spatial relationships before moving heavy pieces.
Steps to create a simple floor plan:
- Set the canvas to scale. Decide on a ratio (e.g., 1 inch = 1 foot). For a 12′ × 15′ room, create a rectangle 12″ × 15″ using Canva’s shape tools. Use the ruler or gridlines (under “View”) to keep proportions accurate.
- Draw walls. Use rectangles or lines to represent walls. Change the color to black or gray and adjust thickness. Mark door swings and window placements with lighter shapes or icons.
- Add furniture. Search Canva’s element library for “sofa,” “table,” “chair,” etc. Resize each piece to approximate scale. A standard sofa is roughly 84″ long, so if 1 inch = 1 foot, the sofa icon should be about 7 inches on the canvas.
- Arrange and experiment. Drag elements around to test configurations. Leave at least 30 inches for walkways and ensure furniture doesn’t block door swings or outlets.
- Label elements. Add text boxes with dimensions or notes (“existing built-in,” “load-bearing wall,” “new window”).
For those new to space planning, reviewing interior design techniques provides foundational principles on proportion and flow. Keep in mind that Canva floor plans are conceptual, they’re not construction documents. If walls are moving or structural changes are involved, hire a licensed architect or engineer.
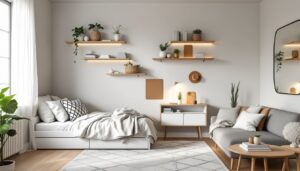
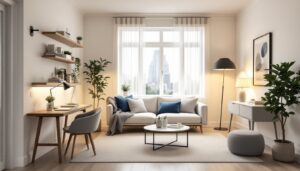
Visualizing Furniture Arrangements and Decor Concepts
Once the floor plan is roughed in, the next step is layering in furniture, decor, and finishes to see how the room comes together. Canva’s asset library includes thousands of furniture icons, but users can also upload their own photos for a custom look.
How to build a furniture arrangement mockup:
- Start with a room photo. Use a straight-on shot of the wall or corner where furniture will go. Upload it to Canva as the background layer.
- Remove distractions. Use Canva’s background remover (Pro feature) or crop tightly around the usable space.
- Drop in furniture. Search for elements like “mid-century sofa,” “round coffee table,” or “floor lamp.” Resize and position them over the photo. Adjust transparency slightly (around 80-90%) to see how pieces layer.
- Add accessories. Rugs, artwork, plants, and pillows help sell the vision. Scale matters, an 8′ × 10′ rug should anchor the seating area, not float in the middle.
- Test color variations. Duplicate the layout and swap colors or styles. This makes it easy to compare options side by side.
For DIYers just starting out, interior design for beginners covers foundational layout principles. Using digital mockups eliminates the physical labor of rearranging furniture six times to find what works. It also helps identify problems before they happen, like realizing a sectional is too big for the room or that the TV will have glare from a west-facing window.
Tips for Presenting Your Design Ideas to Contractors or Family
Canva’s real power shows up when it’s time to communicate. A well-organized presentation gets buy-in faster and reduces miscommunication during execution.
Best practices for sharing:
- Export as PDF. This preserves layout and formatting across devices. Canva lets users download in standard or print quality.
- Use the “Present” mode. Click the present button to turn the design into a slideshow. Walk stakeholders through each section, mood board, floor plan, furniture layout, one screen at a time.
- Share a live link. Canva generates a shareable URL with view or edit permissions. Contractors can review specs on their phones without downloading files.
- Add notes and measurements. Text boxes with callouts (“relocate outlet here,” “paint ceiling Decorator’s White”) eliminate ambiguity.
- Include product links. If specifying tile, hardware, or light fixtures, paste URLs or model numbers directly on the board.
If pitching a remodel to a spouse or co-owner, side-by-side comparisons are persuasive. Show the “before” photo next to the proposed layout, or compare two color schemes in the same format. Visual proof beats verbal explanations every time. Resources like Hunker offer additional inspiration for communicating design ideas effectively.
For projects involving contractors, clarity prevents costly errors. A painter who sees labeled swatches and room photos is far less likely to use the wrong shade than one working from a verbal description. When homeowners apply solid interior design principles, they set realistic expectations and avoid costly rework.
Conclusion
Canva turns abstract ideas into shareable, visual plans that guide decisions and reduce regret. It won’t replace CAD for structural work, but for the majority of cosmetic and layout projects, it’s more than capable. Homeowners who invest time upfront in digital planning avoid expensive mistakes and finish projects with confidence. Start simple, test ideas digitally, and refine before the first piece of furniture moves.