
A moodboard isn’t decoration planning, it’s the blueprint that keeps a redesign on track when paint chips start piling up and fabric swatches blur together. Homeowners who skip this step often end up with mismatched furniture, clashing finishes, and buyer’s remorse on a $900 rug. This guide walks through the process of building a moodboard that translates ideas into actionable design decisions, whether someone’s tackling a single room refresh or a whole-house renovation. By the end, anyone can assemble a visual reference that clarifies style direction, locks in a color palette, and prevents costly guesswork at the hardware store.
Table of Contents
ToggleKey Takeaways
- A moodboard for interior design is a curated visual blueprint that prevents style drift, costly mistakes, and mismatched furniture by locking in color palettes, materials, and design direction before purchases are made.
- Gather inspiration from both digital sources (Pinterest, Houzz, Instagram) and physical materials (paint chips, fabric swatches, magazine tearouts) to identify consistent patterns in your design preferences.
- Use the 60-30-10 color rule to maintain balance—60% dominant color, 30% secondary color, and 10% accent color—and layer textures with intentional wood tones and metal finishes for depth.
- Choose between a digital moodboard (easy to rearrange and share) or physical board (shows true colors and textures), or use a hybrid approach with final samples tested in your actual room’s lighting.
- Organize your moodboard by category and room zones with clear labels, then apply the 48-hour test and limit your palette to five colors or fewer to ensure cohesion and avoid decision fatigue.
- Keep a photograph of your final moodboard on your phone while shopping to prevent impulse purchases and identify splurge items versus savings opportunities in your budget.
What Is an Interior Design Moodboard and Why You Need One
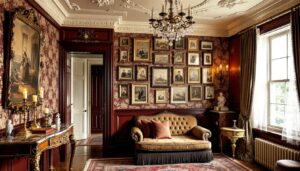
A moodboard is a curated collection of images, materials, colors, and textures that represent the intended look and feel of a space. Think of it as a visual contract with yourself, a single reference point that prevents style drift mid-project.
Professional designers use moodboards to communicate with clients and contractors. DIYers need them just as much, if not more. Without one, it’s easy to fall in love with a farmhouse pendant light one week and mid-century modern chairs the next, ending up with a room that reads like a design committee argument.
A solid moodboard includes:
- Color palette: 3-5 dominant and accent colors
- Material samples: Wood tones, metal finishes, fabric textures
- Furniture inspiration: Silhouettes and styles that fit the vision
- Pattern examples: Wallpaper, tile, or textile patterns
- Lighting fixtures: Both ambient and task lighting ideas
Building one forces decisions early when changes cost nothing but time. It also helps identify what won’t work before someone’s committed to a backsplash they can’t return.
Gathering Inspiration: Where to Find Ideas for Your Moodboard
Start broad, then narrow. The goal isn’t to collect everything that looks nice, it’s to identify patterns in what consistently appeals.
Online Sources:
- Pinterest: Create a private board and save 50-100 images fast. After a few days, patterns emerge, specific color combinations, furniture styles, or architectural details that repeat.
- Houzz: Filter by room type and style. The platform’s photo organization makes it easy to compare similar spaces and identify what pulls a look together.
- Instagram: Follow hashtags like #bathroomreno or #kitchenremodel to see real installations, not just staged photos. Pay attention to the modern design trends that show up in actual homes.
- Design blogs: Sites focused on home decor inspiration often break down why specific combinations work, which helps train the eye.
Physical Sources:
- Paint chips and fabric swatches: Free at hardware stores and fabric shops. Grab extras, they’re easier to compare in natural light at home.
- Magazine tearouts: Shelter magazines show room layouts and furniture arrangements that digital images sometimes crop out.
- Existing pieces: Photograph furniture, rugs, or art that’s staying in the room. The moodboard needs to work with what’s already there.
Job site reality check: If renovating, take photos of the actual space, awkward corners, odd window placements, existing trim. Pretty inspiration photos don’t include the radiator that can’t be moved or the support beam running through the middle of the room.
Choosing Your Moodboard Format: Digital vs. Physical
Digital Moodboards:
Tools like Canva, Milanote, or even PowerPoint work well. Digital boards are easy to rearrange, duplicate for variations, and share with contractors or family members weighing in on decisions.
Advantages:
- Drag-and-drop rearranging takes seconds
- Color-matching tools can pull palettes directly from images
- Easy to save multiple versions (“warm neutrals” vs. “cool grays”)
- Accessible from a phone while shopping
Drawbacks:
- Screen colors don’t always match real paint or fabric
- Harder to judge texture and material weight
- Requires a device to reference on-site
Physical Moodboards:
A foam core board (20″×30″, about $5 at craft stores) or even a large piece of poster board works. Use push pins for easy rearrangement or a glue stick for permanent mounting.
Advantages:
- Actual material samples show true color and texture
- Easy to prop up in the room and view in different lighting
- No screen glare or color distortion
- Satisfying to assemble (sounds minor, but it matters)
Drawbacks:
- Harder to duplicate or modify
- Physical samples take time to collect
- Can’t easily share with someone not physically present
The hybrid approach: Many DIYers start digital for speed, then build a physical board with final material samples before making purchases. That way, the quartz countertop sample sits next to the cabinet door and backsplash tile in the actual room’s lighting, the only way to know if they truly work together.
Selecting Your Color Palette and Design Elements
Start With the Anchor Piece
Identify the one item that’s non-negotiable, an existing sofa, a favorite rug, an heirloom cabinet, or even the hardwood floor that’s staying. Pull the color palette from that piece. If starting from scratch, choose the most expensive or permanent element first (flooring, tile, countertops) and build around it.
Apply the 60-30-10 Rule
This designer ratio keeps color balanced:
- 60% dominant color: Walls, large furniture, flooring. Usually a neutral.
- 30% secondary color: Upholstery, rugs, window treatments. Can be bolder.
- 10% accent color: Throw pillows, art, accessories. This is where personality lives.
For example: gray walls (60%), navy sofa and curtains (30%), burnt orange pillows and lamps (10%).
Choose Material Finishes
Layering textures prevents a flat, showroom look. Aim for variety:
- Wood tone: Warm oak, cool walnut, weathered pine, pick one and stick with it. Mixing wood tones works, but it requires intent (a design pitfall beginners should approach carefully).
- Metal finish: Brushed nickel, matte black, brass, bronze. Consistent hardware throughout a space feels intentional. Mixing metals can work if one is clearly dominant.
- Textile weight: Linen, velvet, cotton, wool. Balance smooth and nubby textures.
Someone planning a kitchen remodel should reference established design methods to understand how material choices influence the overall feel.
Lighting Considerations
Colors shift dramatically under different light sources. Warm LED bulbs (2700-3000K) make whites look creamier and yellows richer. Cool LEDs (4000K+) render blues and grays more accurately but can feel clinical in living spaces.
Test paint samples and fabric swatches in the room at different times of day. A gray that looks perfect at noon might read purple at night under warm bulbs.
Arranging and Organizing Your Moodboard Components
Group by Category
Cluster similar elements together, all flooring options in one corner, lighting in another, textiles grouped separately. This makes it easier to compare options within a category and spot gaps (“We have six sofa ideas but no rug inspiration”).
Create Visual Hierarchy
Larger, more permanent elements go toward the center or top: flooring samples, wall colors, major furniture. Smaller accents and accessories go toward the edges. This mirrors how the eye will experience the actual room, big shapes first, details second.
Leave White Space
A crammed board is hard to read. Aim for 60-70% coverage, with breathing room between elements. If working digitally, use a neutral background (light gray or off-white) instead of pure white, which can distort color perception.
Add Labels and Notes
Write down specifics:
- Paint color names and brands (“Sherwin-Williams Agreeable Gray SW 7029”)
- Product names (“IKEA Kallax shelf, white”)
- Dimensions (“rug, 8’×10′”)
- Source and approximate cost (“West Elm, $450”)
Three months into a project, memory gets fuzzy. Labels prevent the frustration of loving something on the board but having no idea where it came from.
Arrange by Room Zones
For whole-room renovations, organize the board the way the space flows. Kitchen moodboard? Group cabinetry, countertop, and backsplash together, then appliances, then lighting. This helps spot where design elements might clash or fail to connect visually across zones.
Refining Your Vision: Editing and Finalizing Your Moodboard
The 48-Hour Test
Step away from the moodboard for two days. When returning to it, some choices will still feel right, others won’t. Fresh eyes catch mismatches and overcommitments to a trend that might not wear well long-term.
Audit for Cohesion
Squint at the board. If it reads as a chaotic mess of competing ideas, it’s not ready. Every element should feel like it belongs in the same home, even if individual pieces are distinct. Ask:
- Does one style dominate, or is it split between modern and farmhouse?
- Do wood tones fight each other?
- Is there a clear color story, or does it look like a sample table at a paint store?
Get a Second Opinion
Show the board to someone whose taste aligns with the goal. Not for approval, for blind spots. A friend might point out that three different “white” paint chips are actually three different undertones that won’t work together.
Anyone working on their first major project should consider reviewing basic design principles to avoid common missteps.
Limit the Palette
If there are more than five colors, cut it down. Same with materials, six different wood finishes is four too many. Tighter editing leads to stronger results. A focused approach prevents decision fatigue and buyer’s remorse later.
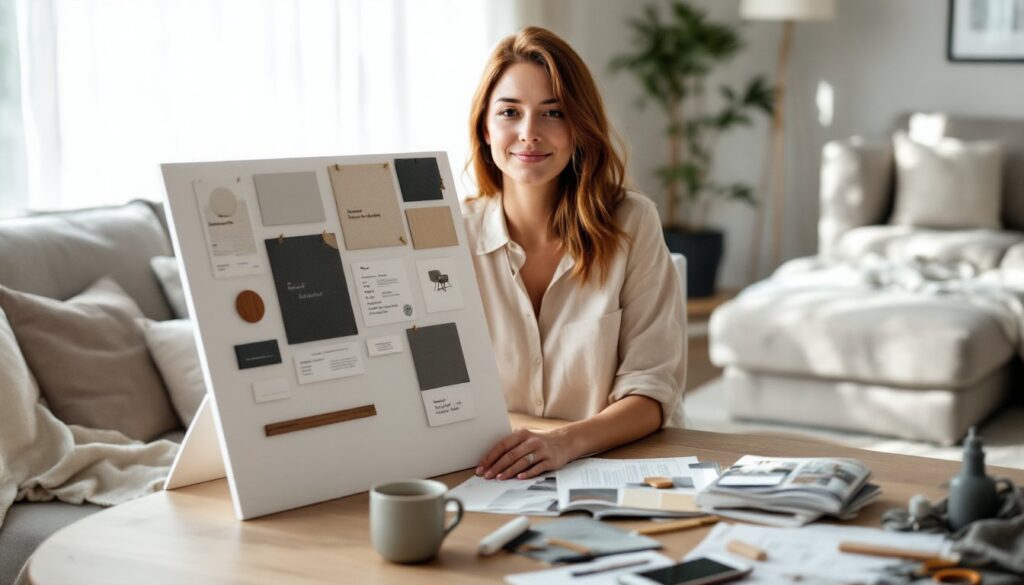
Photograph the Final Board
Take a high-quality photo and keep it on a phone. Reference it while shopping to avoid impulse buys that derail the plan. It’s also handy when asking a contractor for a quote, visual communication is faster than trying to describe “that one shade of blue, kind of teal but not too green.”
Create a Budget Backup
Identify which elements are splurges and which are saves. If the dream sofa is $3,000 but the budget’s tight, find a $1,200 alternative and add it to the board. Knowing where flexibility exists prevents project stalls when the perfect piece is out of reach. Looking at real design examples can reveal where others invested and where they saved.
Conclusion
A finished moodboard is a decision-making tool, not a decoration. It prevents expensive mistakes, keeps a project focused, and turns vague ideas into a concrete plan. Homeowners who invest the time upfront spend less money correcting mismatches and more time enjoying a space that actually feels like it was designed, not assembled.