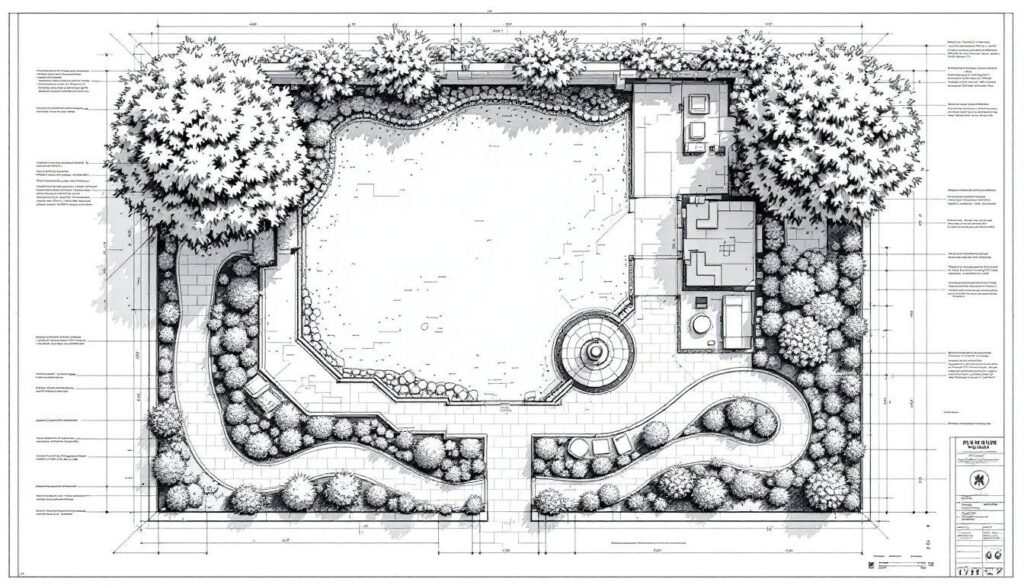

The ideal yard doesn’t happen by accident. Whether you’re looking to increase property value or make your lawn more attractive, having a plan is crucial.
A blueprint helps to establish the core foundations of what you want to achieve. It creates a clear vision that everyone involved can follow by eliminating guesswork. However, there’s a fine art to putting a strong landscape design plan into action. Here’s how to develop the architectural framework for your ideal outdoor space.
Table of Contents
ToggleFrom a Patch of Dirt to a Future Dreamscape
Standing in front of a patch of dirt that’s about to begin its transformation into your ideal outdoor space is exciting. It may appear like organized chaos at first, but it’s also a clear sign of a strategically planned vision taking shape.
The signs you’re onto a strong architectural blueprint include:
- Strategic earthworks: The ground has newly dug trenches for irrigation or graded slopes for a future patio.
- Visible marking: The general design has come to life through spray-painted outlines, stakes and string mapping.
- Staged materials: You have placed stacked pallets of flagstone, piles of topsoil and groupings of sourced trees in designated zones.
- Equipment and attachments: Major outdoor projects require powerful tools. Attachments like modern trenchers are strong enough to cut through solid materials and heavy tree roots, making challenging trench digs easier.
However, these beginning points don’t happen without a solid plan and a carefully considered blueprint.
Step 1: Analyze Your Site and Set Your Goals
Here’s where you can set the stage for your vision of a perfect outdoor space. Basic site analysis helps you survey like a professional, which can influence how your plans are drawn.
Walk your property carefully. Take note of the sun and shade patterns, soil type and wind direction. Document any key existing features or problematic areas of concern. This is a vital step. It provides you with clear information about your property’s unique conditions, and it is common practice for professionals to assess a space.
Step 2: Apply Key Principles of Landscape Design
There are several common landscape design principles to consider. Four of these are key foundational points that help maintain artistic vision within the larger blueprint.
- Unity: A unified outdoor space ties together color schemes, plant types and materials. This approach prevents too many ideas from creating chaos.
- Balance: Good balance keeps your outdoor space feeling stable. It distributes visual weight through symmetrical features, varied plant sizes or carefully placed hardscape elements.
- Scale and proportion: It’s important to match the size of your property and human dimensions to surrounding structures. This helps create the right perception of yard space.
- Rhythm: A sense of movement and pace can be satisfying to the eye. Alternating plant heights or repeating color patterns can help to achieve good flow.
Step 3: Draft Your Master Blueprint
Here’s where your goals, design principles and artistic vision can be translated into drawings. Start simple by creating bubble diagrams to create distinct zones or outdoor rooms.
Look at inspiration for developing inviting, well-defined spaces and cozy backyard ideas, such as walkways or fire pit areas. You can create built-in seating with cinder blocks or repurposed bricks.
These diagrams can be refined into master plans that map out the specific flows and features of the space.
Step 4: Prepare Your Site for Transformation
This is the time to put your planning into action so your site is ready before planting begins, as the right preparation methods set you up for success.
Be sure to remove any unwanted vegetation and grade the land to prepare for proper drainage. You should also amend the soil to create an optimal growth environment.
Step 5: Choose and Place Your Plants
Choose visually appealing plants that complement your aesthetic goals. They should be appropriate for the site’s conditions.
Consider a healthy mix of trees, shrubs and perennials, taking seasonal factors into account. Think of the kind of sun, soil and climate your outdoor space has to narrow down your selection.
Refer back to your master blueprint to position the chosen plants. Here’s where you can combine strategy with creativity, using layers and groupings to create the balance and scale you envisioned in your design.
Step 6: Add Lighting and Final Touches
The final touches can add depth and character to your outdoor space. Don’t overlook how effective outdoor lighting can be at making your yard safer while accentuating focal points.
Consider decorative pots and garden art and how they work within your lighting. You can create a minimalist, nuanced space with a few sparse ornaments, or convey excitement and vitality through a busier-looking outdoor design.
From Blueprint to Completed Area
A strong blueprint sets you up for the ideal outdoor space while allowing room for change and alterations in the future. You have a strong foundation to build on, and half the fun is making updates to your style or creative choices.
From elevating the look of your home to increasing its resale value, the definition of a perfect space is very personal. The right blueprint at the beginning of the process ensures that you achieve your very own definition of perfection.